
Party Photography Shooting Settings & Techniques for Beginners
So you’re thinking about shooting your first party? Or maybe you’ve tried shooting a one or two and things just aren’t turning out right. Luckily we’re here to help you get started on the right foot with a few settings and techniques that may help things along for you. You don’t have to take our tips for gospel, rather playing around with what we suggest to produce the best result you can. These settings and techniques all relate to photography indoors at night, or in a dim light situation. We assume you’re using a DSLR and have an external flash attached to your camera.
The first thing to ensure on your camera is that you have it set to Manual. It is essential that you are able to freely change the shutter speed, aperture, and ISO on your camera. Start off with a fairly high shutter speed like 1/80 or 1/100. This will ensure that your subjects are not blurry, and a party people can move around especially quickly or you could even get bumped by someone else while trying to take a photo. Shooting with a fast shutter speed will take the risk away from moving while you’re taking the shot. In addition, you’ll find you get a nice sharp quality image.
Set your aperture rather large (which is actually a smaller f-stop). What you are able to set this to will depend on your camera and your lens. A good example would be an aperture of 2.8 or 3.5. This will let you take in a decent amount of light with the fast shutter speed you’re using.
Set your ISO to something around the 200-300 mark if you’re using a DX camera, or around 400-600 if shooting with a full frame camera. This will let you take full advantage of any exciting lighting at the party or event.
You may find that you need to play around with your exposure. With the above settings combined with an external flash, you might find that you need to set the exposure on your camera to -3 or -7, as well as possibly even altering your external flash settings to -3 or -7. This could be an important factor for you as with party photography you do not want your subject’s face lit up bright white. Again, test these out to figure out what works best for your equipment set up and photography destination.
Lastly, always make sure to set your image file type to RAW. This will allow you to fix any errors in the post production process, and tweak anything that needs playing around with. Adobe Lightroom is a great tool for this and something we use religiously for any editing work.
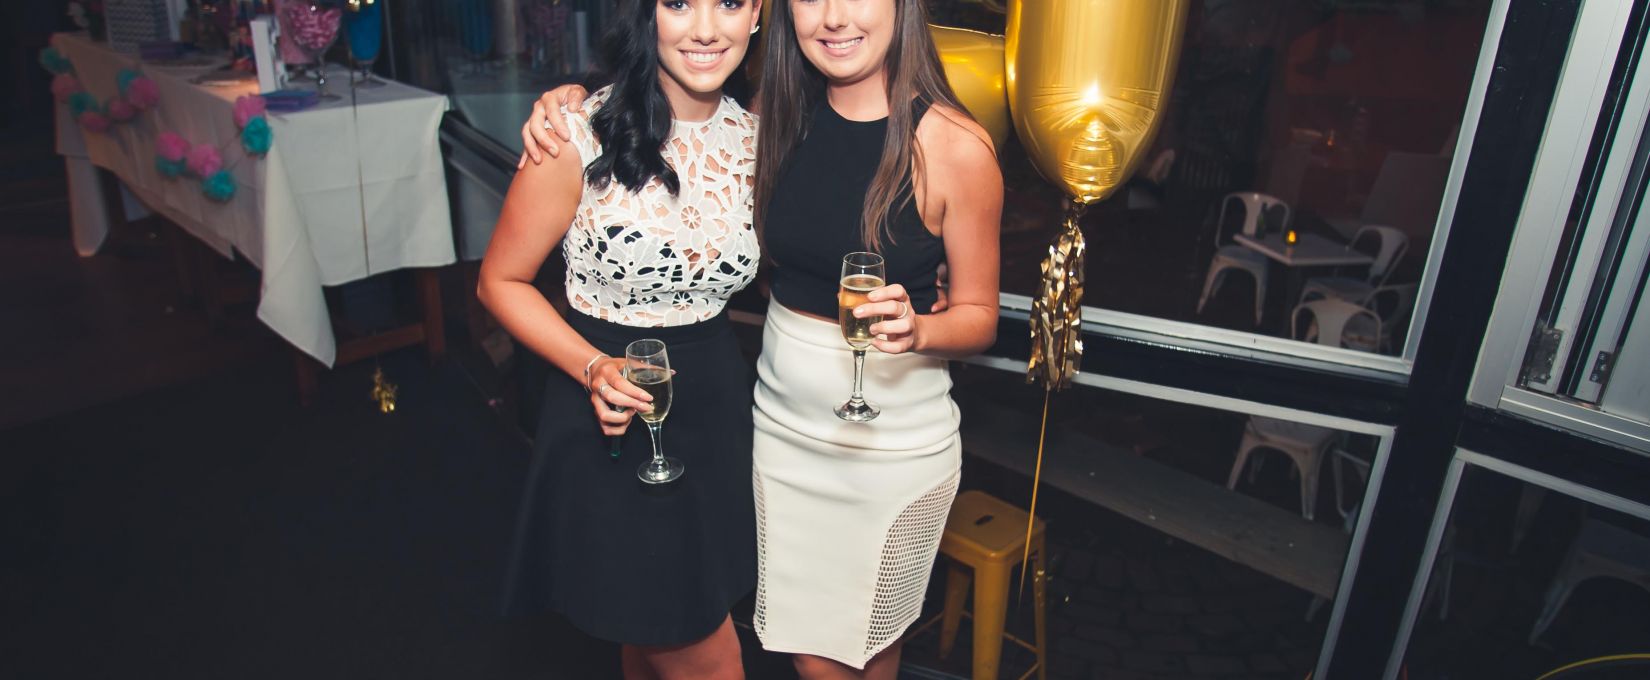
Here is an example below, shot with a 20mm lens. Settings used were; f2.8, 1/80, ISO 400, exposure on camera -7, settings on flash -7. The image was edited in Adobe Lightroom, but we’ll get to that in a later post.
Hopefully this helped a few of those people with no idea where to start. It’s all about trial and error so keep playing around with your settings, make sure you know your gear inside and out, and you will find a winning formula for you.


0 Comments